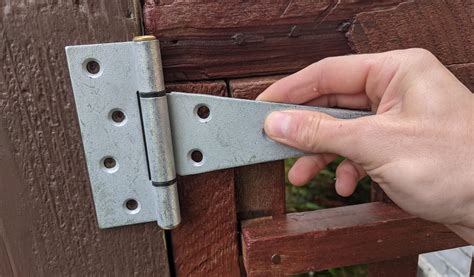
Are you looking to install gate hinges but don’t know where to start? It can be intimidating, but don’t worry – we’ve got your back! In this article, we’ll show you exactly how to get the job done. From choosing the right type of hinge to understanding the tools you need, we’ll cover it all. So, what are you waiting for? Let’s get started and make sure your gate is secure!
Preparing to Install Gate Hinges
Installing gate hinges is a relatively simple task that can make a big difference in the look and feel of your property. Before you begin, there are a few steps you should take to ensure a successful installation.
Measure Twice, Cut Once
The old saying “measure twice, cut once” applies here. You want to make sure you have accurate measurements before beginning so that your finished product looks good and functions properly. Measure both the gate and the post to determine the size of hinge you need. You also want to measure the distance between the post and the gate to ensure that your chosen hinge will fit properly.
Choose Your Hinge Type
Once you know the size and type of hinge you need, it’s time to choose the right one for the job. There are two main types of gate hinges: strap hinges and butt hinges. Strap hinges attach to the gate with screws, while butt hinges connect directly to the post with lag bolts. Depending on the style of your gate and the weight of the material, you may need to use different types of hinges.
Get the Right Tools
Before you start installing your hinges, make sure you have all the necessary tools. For most installations, you’ll need a drill, screwdriver, adjustable wrench, measuring tape, and possibly a saw or jigsaw. If you’re using strap hinges, you’ll also need a power drill and a set of hole saws. Make sure you have everything you need before starting the project.
Prepare the Posts
Once you have all the materials and tools you need, it’s time to prepare the posts. Start by cleaning the area around the post and removing any debris or dirt. Next, mark the center of the post where the hinges will be installed. Using a level, make sure the marks are even and aligned correctly. Then, drill pilot holes for the lag bolts (if using butt hinges).
Install the Hinges
Now that you’ve prepared the posts, it’s time to install the hinges. If you’re using strap hinges, attach them to the gate first and then secure them to the post with screws. If you’re using butt hinges, attach them to the post first and then secure them to the gate with lag bolts. Be sure to use the appropriate fasteners and check the tightness of each bolt after installation.
Finishing Touches
After the hinges are installed, add some finishing touches. Check the alignment of the gate and adjust as needed. If you’re using butt hinges, add decorative caps to cover the lag bolts. Finally, apply a coat of paint or sealant to protect the metal from rust and corrosion.
Installing gate hinges may seem like a daunting task, but it doesn’t have to be. With the right preparation and tools, you can get the job done quickly and easily. Just remember to measure twice and cut once, choose the right type of hinge, get the right tools, prepare the posts, and finish off with some decorative touches. Good luck!

“Hinge It Up! A Step-by-Step Guide to Installing Your Gate Hinges Like a Pro”
- Gather the necessary materials: hinges, gate, screws, drill, and screwdriver
- Decide where you want to install the hinges. If your gate is attached to a wall or fence, then make sure the hinge side of the gate is facing the wall or fence.
- Drill holes in the gate and wall/fence for the screws. Make sure they’re deep enough that the screws will be secure when installed.
- Install the hinges onto the gate. Place one hinge on each side of the gate and line them up with the drilled holes.
- Secure the hinges to the gate using the screws. Make sure they’re tight so the gate won’t move around when opened and closed.
- Hang the gate on the hinges. Line up the holes in the hinges with the ones in the wall/fence and secure them using the screws.
- Test the gate to make sure it opens and closes properly. Check that all the screws are tight and the hinges aren’t loose.
You’re All Set: Installing Gate Hinges Was a Piece of Cake!
And there you have it: the complete guide to installing gate hinges. We’ve gone over all the steps you need to take, from measuring your gate and hinges to attaching them securely with screws. With this knowledge, you can now confidently install any type of gate hinge in no time! So go ahead and give it a try – who knows, you might just surprise yourself at how easy it is! Good luck, and happy DIY-ing!
Q&A
You’ll need a drill, a tape measure, and some screws to install gate hinges. Make sure you have the right size screws for your hinges! Good luck!
Make sure the hinges are flush with the door and frame, use a level to ensure they’re even, then secure them with screws. Good luck!
Yes! Make sure to use the right size and weight of screws, wear safety goggles when drilling, and double check that the gate is level before attaching the hinges.
Depends on the size and weight of your gate – generally a heavy-duty hinge like a strap or butt hinge is best. For lighter gates, an adjustable spring hinge works great. If you’re unsure, consult with a local hardware store expert!


